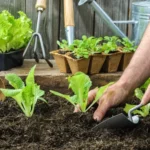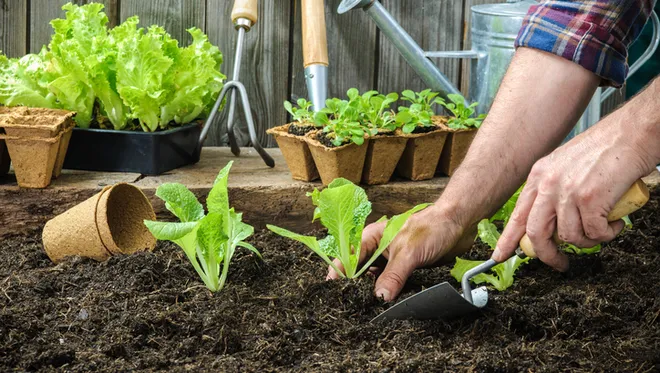
Creating a neat and defined garden edge can instantly elevate the look of your outdoor space. Whether you want to keep grass from creeping into flower beds or add a polished finish to your landscaping, installing a garden edge is a smart move. It’s a simple project that anyone can tackle with the right tools and a bit of guidance.
You don’t need to be a gardening expert to get it right. With clear steps and some patience, you’ll have a clean, professional-looking border that lasts for years. Let’s dive into how to install garden edging that suits your style and garden needs.
Understanding Garden Edging
Garden edging defines your outdoor space by separating planting areas from lawns, paths, or driveways. You can choose from various materials that suit your garden’s style and maintenance needs.
Types of Garden Edging Materials
- Metal Edging: Durable steel or aluminum strips offer a sleek, modern look. Ideal for creating clean lines and curbs.
- Plastic Edging: Flexible and affordable, plastic suits curved designs and easy installation but may wear faster outdoors.
- Brick or Stone Edging: Provides a classic, sturdy border with natural appeal. Perfect for formal gardens or raised beds.
- Wood Edging: Timber boards or logs add warmth but require treatment against rot for longevity.
- Concrete Edging: Molds into shapes and offers high durability. Suitable for heavy-use areas or contemporary layouts.
Benefits of Installing Garden Edging
- Controls Plant Spread: Prevents grass or weeds from invading flower beds, maintaining tidy planting zones.
- Enhances Aesthetic Appeal: Creates crisp, defined lines that improve the garden’s overall design and curb appeal.
- Simplifies Maintenance: Makes mowing and trimming easier by delineating borders clearly.
- Improves Soil Retention: Helps keep mulch and soil in place during rain or watering, protecting plant health.
- Increases Property Value: Well-installed edging reflects care and investment, making your outdoor space more attractive to buyers.
Preparing for Installation
Proper preparation ensures your garden edge will look neat and last longer. You’ll gather the right tools and materials and plan the layout accurately before starting the installation.
Tools and Materials Needed
Gather essential tools like a spade or edging tool for digging, a tape measure for checking lengths, a rubber mallet to tap edging into place, and a level to maintain an even edge. Materials depend on your choice of edging such as metal strips, plastic strips, bricks, stones, wood, or concrete blocks. Also prepare gloves for protection, stakes and string for marking, and a garden fork or hoe to loosen soil.
Measuring and Planning Your Garden Edge
Measure the total length of the garden area you want to edge using a tape measure. Mark the outline with stakes and string to create a visible guide. Plan curves and corners carefully, as sharper bends may require flexible edging material or cutting to fit. Consider any slopes or changes in elevation to ensure a smooth, continuous edge. Accurate measurements and clear planning reduce material waste and simplify installation.
Step-by-Step Guide on How to Install Garden Edge
Follow these clear steps to install your garden edge efficiently and effectively.
Marking the Edging Line
Begin by outlining the garden edge using stakes and string to create a precise guide. Measure your planned border length accurately, and use a garden hose or spray paint to shape curves smoothly. Marking clearly ensures a straight or gracefully curved edge, simplifying trench digging and material placement.
Digging the Trench
Dig a trench along the marked line, keeping its width slightly wider than the edging material for easy insertion. Depth should match or exceed the edging height, allowing partial burial to stabilize the border and prevent soil movement. Remove roots, rocks, and debris to create a smooth trench base for secure installation.
Placing and Securing the Edging
Install the edging pieces into the trench, aligning them tightly for a continuous border. Use a rubber mallet to drive stakes or edging firmly into the ground without damage. Level the edging with a spirit level to maintain an even height, adjusting depth as needed for consistent visibility and stability.
Backfilling and Finishing Touches
Backfill soil over the trench edges, packing it firmly against the edging to anchor it in place and prevent shifting. Add mulch or decorative gravel along the border for a polished look and additional soil retention. Clean the garden edge with a brush to remove dirt and inspect for any gaps or misalignments, correcting immediately for a professional finish.
Maintenance Tips for Garden Edging
Maintaining your garden edging keeps it functional and attractive. Regular care extends its lifespan and preserves the clean separation between garden beds and other areas.
Cleaning and Repairing
Clean garden edging monthly by removing dirt, leaves, and debris with a stiff brush or garden hose. Inspect materials like wood or metal for signs of rot, rust, or cracks. Repair small cracks in concrete or stone with appropriate filler to prevent further damage. Replace damaged sections promptly to maintain a uniform appearance. Use a protective sealant on wood and metal edging annually to resist weathering.
Seasonal Considerations
Adjust care routines based on seasonal changes. In fall, clear fallen leaves to prevent moisture buildup that causes decay. In winter, avoid piling snow or ice on edging to reduce freeze-thaw damage, especially for stone and concrete. In spring, check for shifts caused by ground freeze and thaw cycles, re-secure or realign edging as needed. Summer heat may cause wood to dry and warp; apply water-based sealant during warm months to preserve integrity.
Conclusion
Installing garden edging is a simple way to bring structure and style to your outdoor space. With the right preparation and tools, you can create clean, defined borders that enhance your garden’s overall look and functionality.
Taking the time to plan carefully and follow the steps ensures your garden edge will be both attractive and durable. Plus, regular maintenance keeps it looking sharp year-round.
By adding garden edging, you’re not just improving aesthetics—you’re making your garden easier to manage and increasing your property’s value. It’s a small investment that delivers lasting benefits you’ll appreciate every time you step outside.

Hi, I’m Md Rofiqul, a gardening enthusiast who loves spending time in the garden and backyard. I enjoy caring for plants, growing flowers and vegetables, and creating a green space that feels peaceful and refreshing. Gardening is more than just a hobby, it’s a passion that connects me to nature and brings joy to my daily life. Living with plants inspires me to embrace simplicity, patience, and sustainability while making every day more colorful and rewarding.