Drilling stainless steel might seem daunting, but with the right techniques and tools, you can tackle this task like a pro. Whether you’re working on a home improvement project or crafting something special, knowing how to drill stainless steel is essential for achieving clean, precise holes.
Understanding Stainless Steel
Stainless steel is a corrosion-resistant alloy, known for its strength and versatility. Understanding its properties and applications helps you navigate drilling projects effectively.
Properties of Stainless Steel
- Corrosion resistance: Stainless steel contains chromium, which forms a protective layer that prevents rust and corrosion.
- Durability: Stainless steel maintains structural integrity under high stress and extreme temperatures, making it suitable for various environments.
- Workability: The alloy’s malleability allows for effective machining, though its hardness can complicate drilling.
- Aesthetic appeal: Stainless steel’s polished finish enhances visual appeal, ensuring projects maintain a clean appearance.
- Hygienic properties: Non-porous and easy to clean, stainless steel is ideal for applications in food preparation and medical environments.
Common Applications
- Construction: Used in framework, beams, and supports for buildings and infrastructure due to its strength.
- Automotive: Found in exhaust systems, trim, and structural components, enhancing performance and longevity.
- Kitchenware: Utilized in cookware, sinks, and appliances for its hygienic and corrosion-resistant properties.
- Medical equipment: Employed in surgical instruments and devices, ensuring high standards of cleanliness and durability.
- Furniture: Incorporated into modern designs for tables, chairs, and fixtures due to its aesthetic qualities and resilience.
Tools Required for Drilling
You’ll need specific tools for drilling stainless steel effectively. Understanding the types of drills, drill bits, and safety gear keeps the process efficient and safe.
Drill Types
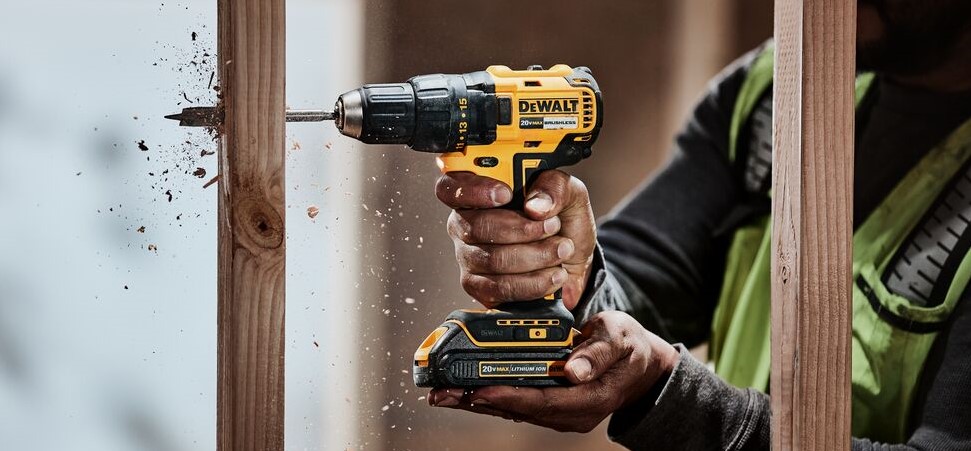
- Corded Drill: Offers consistent power for heavy-duty tasks. Ideal for drilling in thicker stainless steel.
- Cordless Drill: Provides portability and ease of use. Useful for lighter jobs and when mobility is essential.
- Pistol Grip Drill: Offers greater control, especially for precision tasks. Suitable for small, detailed holes.
- Hammer Drill: Effective for those who encounter tougher stainless steel grades. Adds a percussion action to the drilling process.
Drill Bits
- Cobalt Drill Bits: Made from high-speed steel with cobalt added. These bits excel in cutting through stainless steel’s hardness.
- Titanium Coated Bits: Durable with increased heat resistance. Good for creating smooth holes with less friction.
- Carbide Drill Bits: Strong and heat-resistant, these bits work well for the toughest grades of stainless steel, although they may be more brittle.
- Split Point Bits: Prevent wandering and provide better precision during drilling. Ideal for starting holes in stainless steel.
Safety Gear
- Safety Glasses: Protect your eyes from metal shavings and debris. Essential for any drilling task.
- Steel-Toe Boots: Offer foot protection against dropped tools or materials. A crucial part of your safety equipment.
- Gloves: Provide grip and hand protection while handling tools or materials. Use cut-resistant gloves for added safety.
- Ear Protection: Guards against noise levels produced by power tools. Important for prolonged drilling tasks to maintain hearing health.
Preparing for the Drill
Preparation plays a vital role in drilling stainless steel successfully. Measuring and marking accurately, along with securing the material firmly, leads to clean and precise results.
Measuring and Marking
Measuring accurately ensures correct hole placement in stainless steel. Use a caliper or measuring tape for precision. Mark the drill spot using a center punch to create a small dimple, which helps guide the drill bit and prevents slipping. For larger holes, consider marking the diameter as a reference to maintain consistent sizes. Double-check measurements before proceeding to ensure the accuracy of your project.
Securing the Material
Securing the stainless steel is essential to maintain stability during drilling. Use a bench vise or clamps to hold the material in place. If drilling large sheets, position the material on a solid surface. Make certain the work area is clear of obstructions to avoid accidents. Placing a piece of wood beneath the stainless steel can help absorb the impact, reducing the risk of damage to the material and tools.
Step-by-Step Guide on How to Drill Stainless Steel
Drilling stainless steel requires careful setup and technique. Follow these steps to achieve accurate results.
Setting Up the Drill
- Select the Right Drill: Use a corded or high-powered cordless drill for consistent performance.
- Choose the Appropriate Drill Bit: Opt for cobalt, titanium-coated, or carbide bits to handle stainless steel’s hardness.
- Adjust Speed Settings: Set the drill to a lower speed for better control and to minimize heat buildup.
- Secure the Material: Clamp your stainless steel piece securely to prevent movement during drilling.
Drilling Techniques
- Mark the Hole: Use a center punch to mark the exact drilling point. This helps guide the bit.
- Start with a Pilot Hole: Drill a small pilot hole first to ease the larger drill bit into the material.
- Apply Steady Pressure: Maintain consistent pressure, without forcing the drill, to keep the bit on track.
- Maintain a Straight Angle: Hold the drill perpendicular to the surface for even drilling and to avoid bit breakage.
Cooling Methods
- Use Cutting Fluid: Apply cutting oil or lubricant to reduce friction and heat buildup during drilling.
- Periodically Pause: Take breaks while drilling to allow the bit to cool down and prolong its lifespan.
- Spray Water: If cutting oil isn’t available, a light spray of water can help cool the bit and prevent overheating.
By following these structured steps, you’ll achieve clean and precise holes in stainless steel.
Tips for Successful Drilling
Successful drilling in stainless steel requires careful attention to detail. Here are specific tips to optimize your drilling process.
Avoiding Common Mistakes
- Neglecting to Use Cutting Fluid: Skipping cutting fluid leads to overheating and accelerates drill bit wear. Always apply cutting fluid to enhance lubrication and prolong bit life.
- Drilling at the Wrong Speed: Using an incorrect speed can cause drill bits to dull or break. Follow the recommended RPM for your specific bit and material thickness.
- Failing to Secure Material Properly: Not securing the workpiece risks injury and inaccuracies. Ensure proper clamping or use a bench vise to prevent movement during drilling.
- Skipping Pilot Holes: Ignoring pilot holes can cause drill bits to wander. Start with a smaller pilot hole to guide the larger bit accurately.
Maintaining Drill Bit Longevity
- Choose Quality Drill Bits: Invest in high-quality cobalt or titanium-coated bits designed for stainless steel. These materials resist heat and maintain sharpness longer.
- Perform Regular Inspections: Check bits frequently for signs of wear or damage. Replace any dull or chipped bits immediately to maintain drilling efficiency.
- Apply Cutting Fluid Consistently: Use cutting fluid not just at the start, but throughout the drilling process. Consistent lubrication reduces friction and heat build-up.
- Store Bits Correctly: Store drill bits in a dry, organized space to prevent damage. Using protective cases can extend their lifespan by avoiding contact with other tools.
Conclusion
Drilling stainless steel doesn’t have to be a daunting task. With the right tools and techniques you can achieve clean and precise holes that meet your project needs. Remember to prioritize safety and preparation to ensure a smooth drilling experience.
Utilizing quality drill bits and maintaining proper speed and pressure will enhance your results. Don’t forget to incorporate cooling methods to prevent overheating and prolong the life of your tools. By mastering these skills you’ll not only improve your craftsmanship but also expand the range of projects you can tackle with confidence.