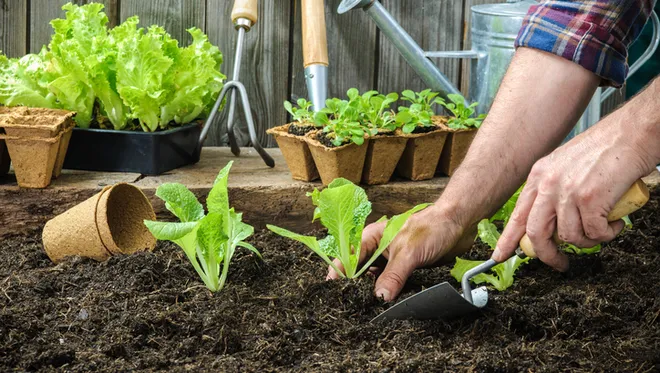
Creating clean edges around your garden bed instantly boosts your yard’s curb appeal and keeps your plants looking tidy. Whether you’re aiming for a sharp, modern look or a soft natural curve, edging helps define your garden space and prevents grass from creeping in.
You don’t need to be a gardening pro or have fancy tools to get started. With a few simple techniques and the right approach, you can transform your garden bed into a polished focal point that enhances your outdoor space. Let’s explore how to edge your garden bed with ease and confidence.
Understanding Garden Bed Edging
Edging a garden bed elevates its overall look and functionality. It defines boundaries, controls overgrowth, and makes maintenance easier.
Benefits of Edging a Garden Bed
Edging creates clear separation between lawn and garden, reducing grass encroachment. It improves water retention by directing runoff away from plant roots. It adds structure to your landscape, making plants and flowers stand out. Edged beds help control weeds, decreasing the time you spend weeding. A well-defined edge simplifies mowing, preventing damage to plants and allowing for faster lawn care.
Different Types of Garden Bed Edging Materials
Plastic edging offers flexibility and affordability, making it easy to install along curves and straight lines. Metal edging provides durability and a sleek, modern finish, staying sturdy against weather and lawn equipment. Stone or brick edging adds a classic, aesthetic appeal while creating a solid barrier. Wood edging, including treated lumber or cedar, blends naturally with garden designs and offers moderate durability. Concrete edging delivers strength and permanence, suitable for formal garden layouts. Each material suits different styles and budgets, so choose one that matches your garden’s needs and your maintenance preferences.
Preparing Your Garden Bed for Edging
Starting your garden bed edging requires careful preparation to ensure clean, lasting results. This step focuses on gathering tools and setting clear boundaries for your garden bed.
Tools and Supplies Needed
Collect essential tools for efficient edging installation:
- Spade or half-moon edger for cutting precise edges
- Garden hose or string to mark curves and straight lines
- Tape measure or ruler for accurate measurements
- Rubber mallet to secure edging materials without damage
- Gloves to protect your hands during labor
- Shovel for clearing soil or weeds as needed
- Wheelbarrow or container to remove debris
- Level to check evenness of edging materials
Selecting appropriate edging materials depends on your garden style. Having these tools ready streamlines the edging process and reduces preparation time.
Clearing and Measuring the Edging Area
Clear the garden bed perimeter by removing grass, weeds, and debris to expose defined soil lines. Use a spade or hoe to pull back grass roots that could cause regrowth under the edging.
Outline the edging path using a garden hose or string, conforming to your garden’s desired shape. Measure lengths with a tape measure, noting dimensions to purchase correct amounts of edging materials.
Mark corners or curves clearly with stakes or spray paint. Level soil surfaces along the path to avoid uneven edging appearance. This preparation sets a solid foundation for installing garden bed edging effectively.
Step-by-Step Guide on How to Edge a Garden Bed
Follow these steps to create a crisp, defined edge that enhances your garden bed’s appearance and functionality.
Marking the Edging Line
Use a garden hose or string to outline the desired edge shape. Trace smooth curves or straight lines, depending on your garden design. Apply landscaping paint or sprinkle flour along the line to mark it clearly. Measure distances to maintain consistent spacing between the edge and nearby plants or structures.
Installing the Edging Material
Select the appropriate edging material based on your garden style and durability needs. Position the material along the marked line, ensuring it sits flush with the soil surface. For rigid materials like metal or stone, dig a shallow trench—about 4 to 6 inches deep—to set the edging firmly. For flexible plastic or rubber edging, press it into the ground along the curve without digging extensively.
Securing and Adjusting the Edging
Insert stakes or spikes through the edging material at regular intervals, usually every 12 to 18 inches, to prevent shifting. Use a rubber mallet to drive stakes fully into the ground without damaging the material. Check the alignment and depth, adjusting as needed to keep the edge straight or smoothly curved. Backfill soil along the edging to stabilize it and enhance the clean separation between lawn and garden bed.
Maintenance Tips for Garden Bed Edging
Maintaining garden bed edging preserves its clean look and functional benefits. Regular upkeep and adapting to seasonal changes extend the life of your edging and keep your garden neat.
Regular Upkeep and Repairs
Inspect your garden bed edging monthly for signs of shifting, damage, or wear. Tighten or reset loose stakes and realign any displaced edging to keep it flush with the soil. Remove grass and weeds growing along the edging line to prevent overgrowth that blurs the boundary. Replace cracked or broken sections promptly to maintain continuous protection against lawn encroachment. Clean edging materials such as metal or plastic with water and mild detergent to remove dirt or stains, enhancing their appearance and longevity.
Seasonal Considerations
Adjust your maintenance routine with the seasons to protect edging from weather effects. In spring, clear any debris accumulated over winter and check for frost heave damage, resetting edging if necessary. During summer, monitor soil moisture levels; dry soil can cause some materials like wood to shrink or crack, requiring periodic checks. In fall, remove fallen leaves and organic matter that can trap moisture against edging, possibly causing decay or rust. Winter-proof your garden bed by reinforcing edging stakes before frost sets in, especially in colder regions where freeze-thaw cycles might shift edging out of place.
Conclusion
Edging your garden bed is a simple way to bring structure and style to your outdoor space. With the right preparation and materials, you can create clean lines that highlight your plants and make maintenance easier.
By staying consistent with upkeep, your garden bed edges will stay sharp and effective season after season. Taking these steps ensures your garden looks polished and inviting, enhancing both its beauty and functionality.
You don’t need to be a pro to achieve professional-looking results—just a bit of patience and the right approach will transform your garden into a well-defined, attractive area you’ll enjoy all year long.

Hi, I’m Md Rofiqul, a gardening enthusiast who loves spending time in the garden and backyard. I enjoy caring for plants, growing flowers and vegetables, and creating a green space that feels peaceful and refreshing. Gardening is more than just a hobby, it’s a passion that connects me to nature and brings joy to my daily life. Living with plants inspires me to embrace simplicity, patience, and sustainability while making every day more colorful and rewarding.